
We have a fun Valentine tradition…in stead of going crazy on lots of holiday candy, I serve up one of my family’s favorite cakes instead! It might surprise you to hear that this cake, that’s an anticipated treat in my household of boys, is a Lavender Poundcake! I know it sounds a little dainty and sweet, and I have served it to my gal pals and at baby & wedding showers…but this mini cake sure packs a punch of buttery goodness and density that will satisfy any guy in a big way! And because it’s such a rich dessert I usually save it for special occasions…like Valentine’s Day! So each holiday I try to come up with a new look for our miniature cake…which for me is almost as enjoyable as eating it! Today I’d like to share with you the recipe for this fun and unique poundcake…plus another recipe for an equally festive dessert that’s more semi-homemade but still perfect for Cupid! So find your apron and get the kitchen ready for some baking joy and…
share some Valentine sugar!
Lavender Poundcake…
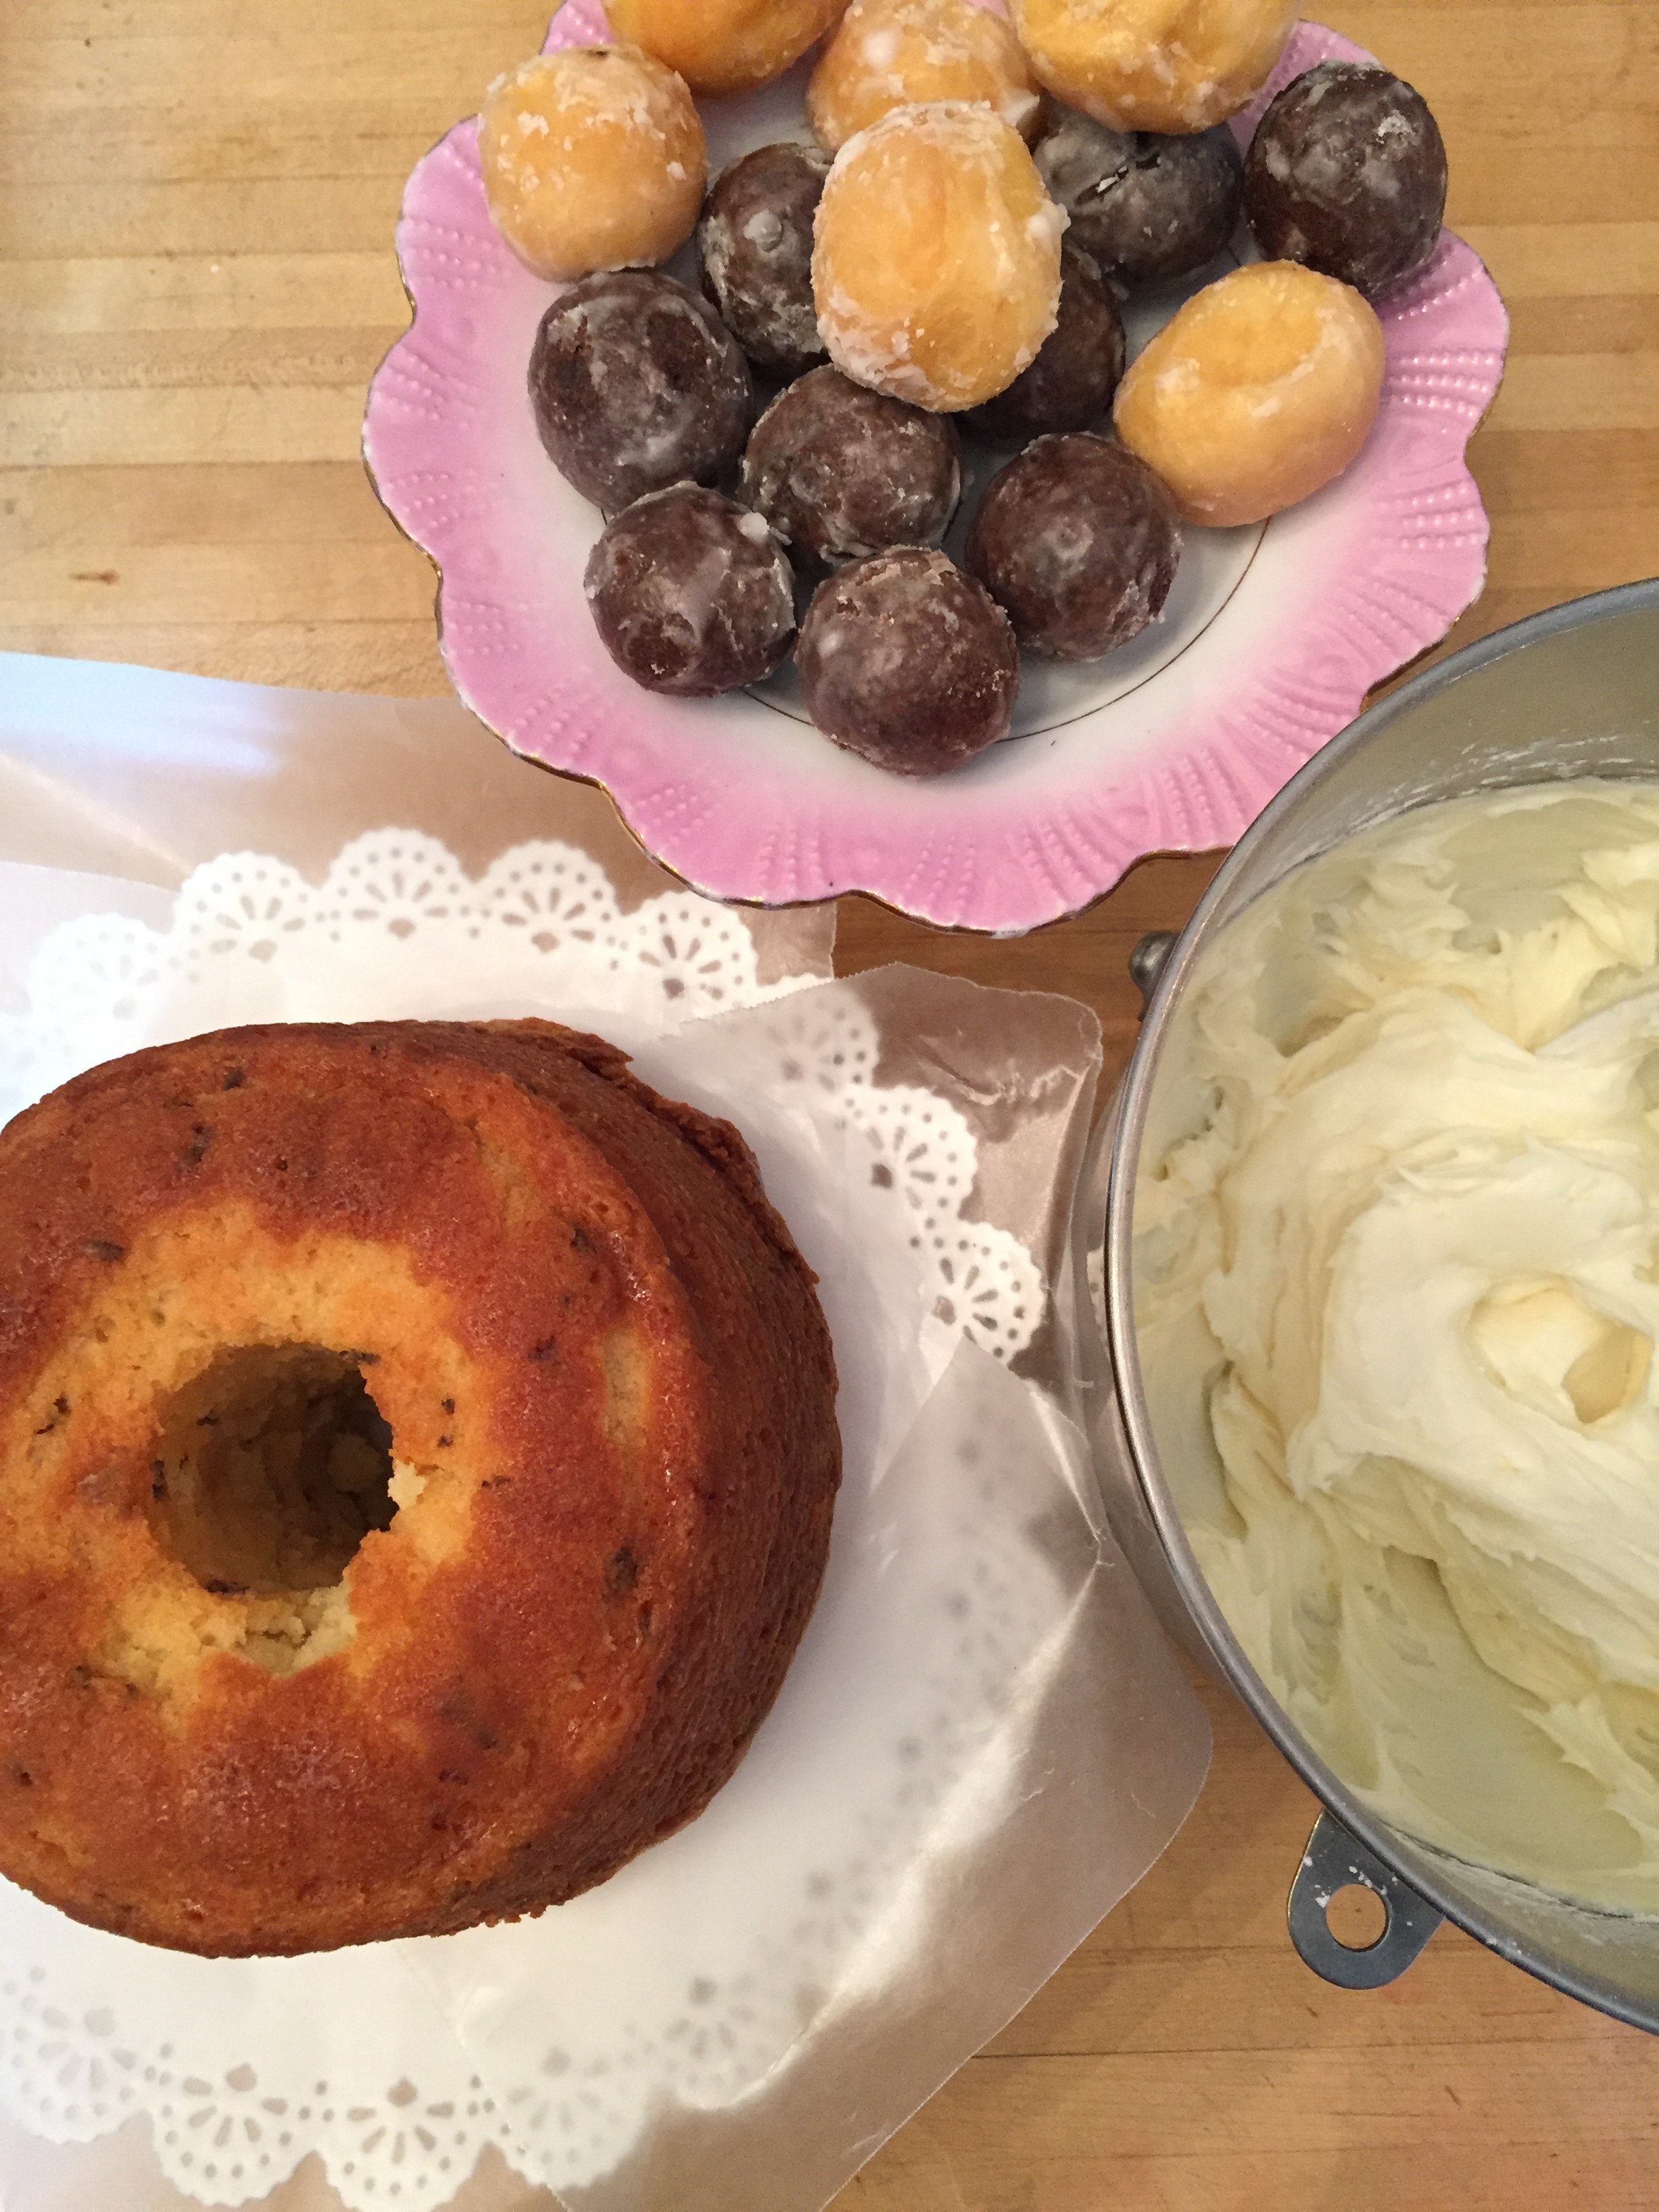
my mom gave me the recipe for this sweet poundcake years ago…and we’ve been making them ever since! the fun thing about this little cake is the size. we usually bake a pair in pudding molds which look a lot like a mini bundt pan…
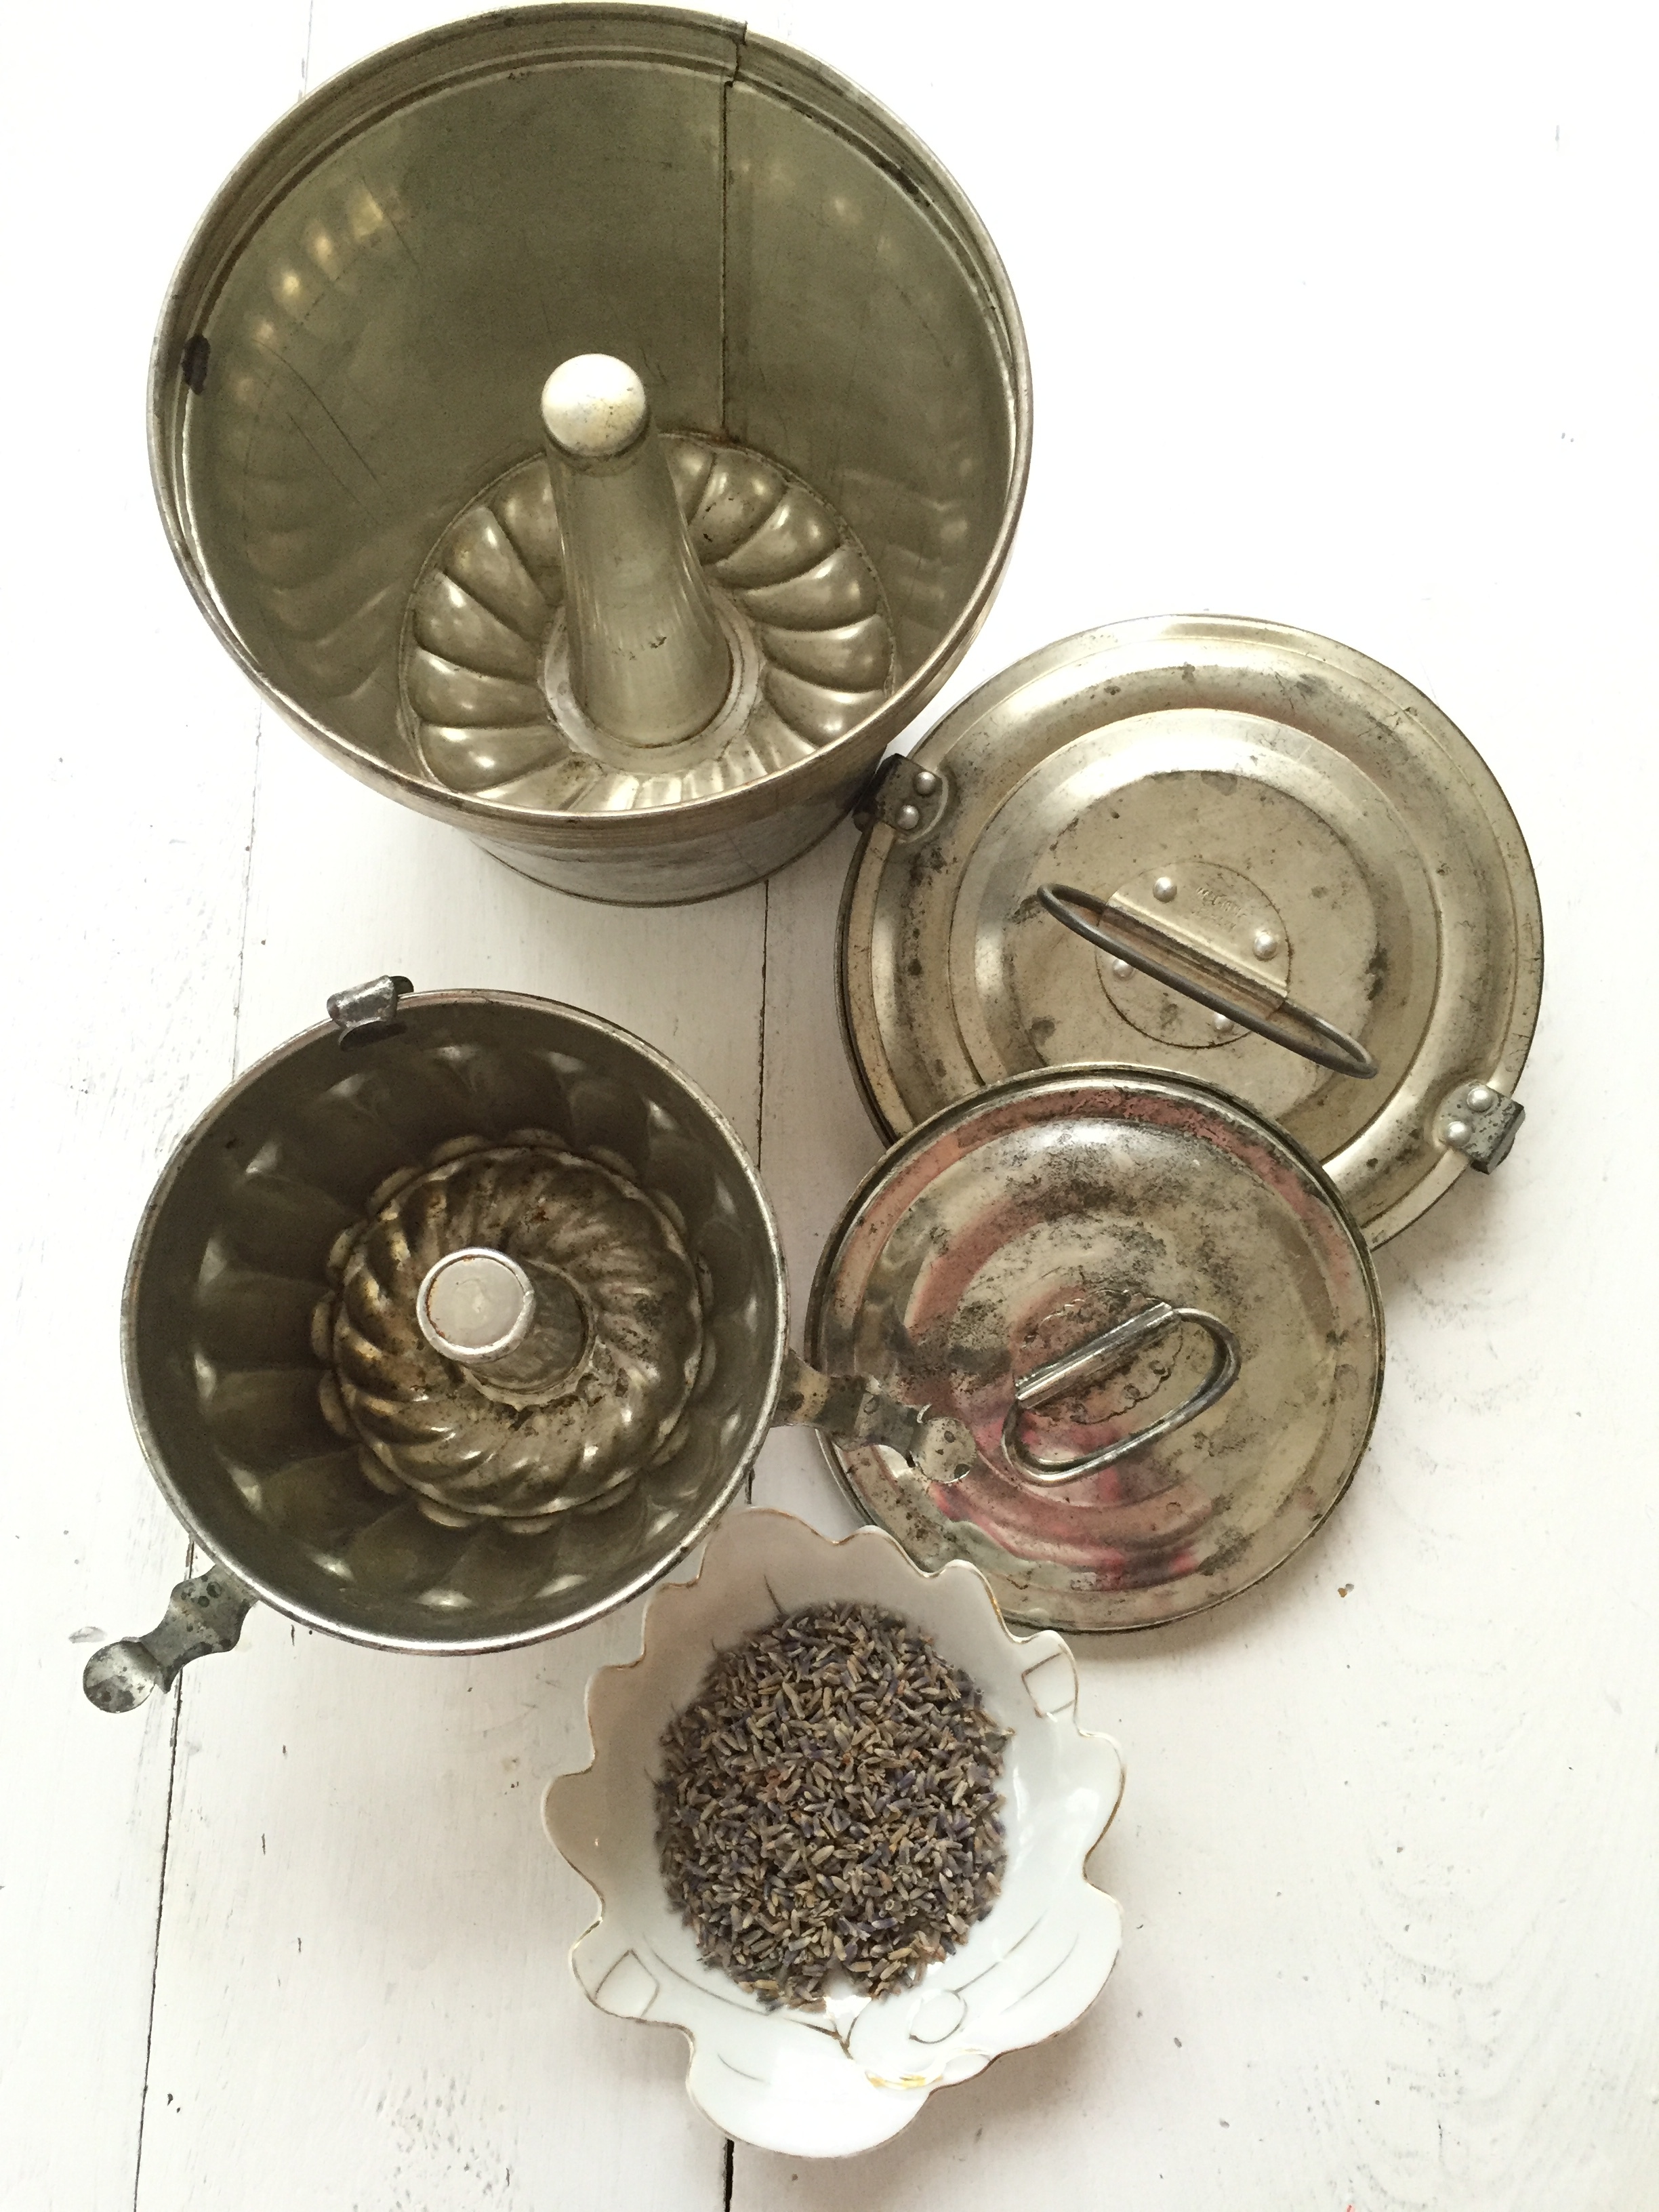
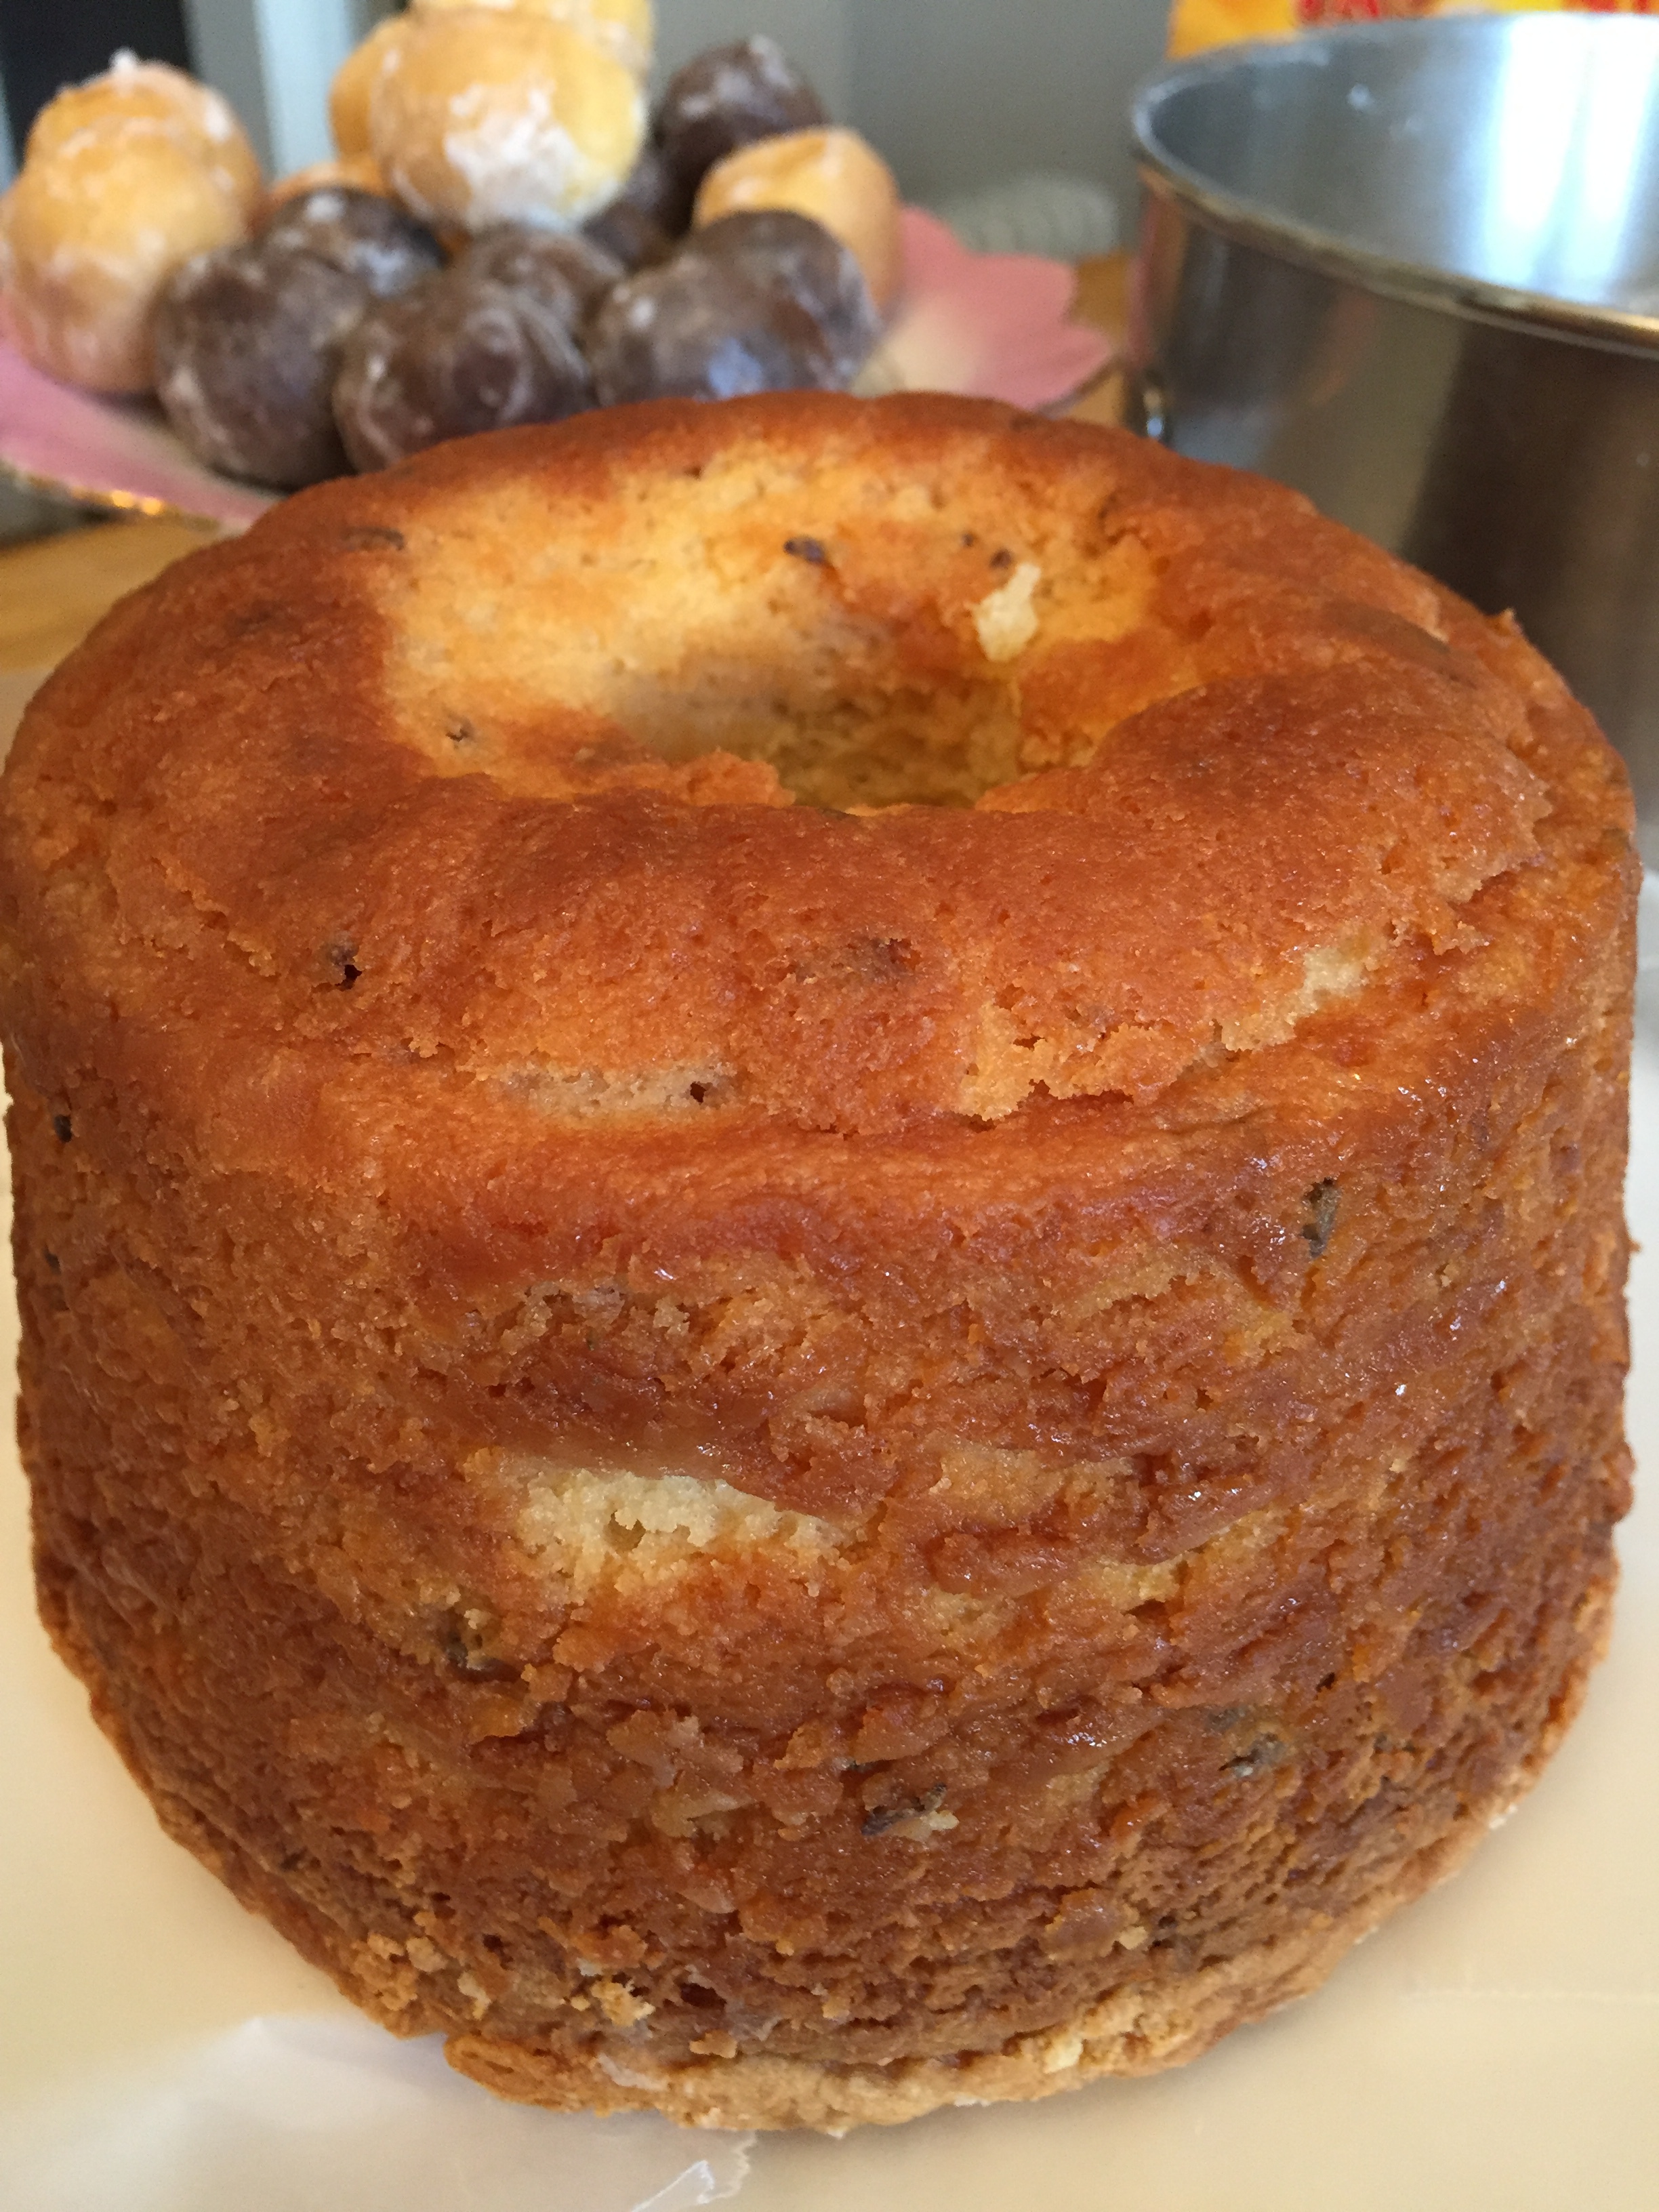
if you don’t have pans like these you can use new, clean flower pots or loaf pans! you can also use a single regular size bundt or angel food cake pan but the cake won’t really rise much so don’t be surprised if it’s short & squatty…but that would still be adorable! i’ll share the printable recipe at the end of this post. when your cake comes out of the oven regardless of the pan you choose, it will look something like this…
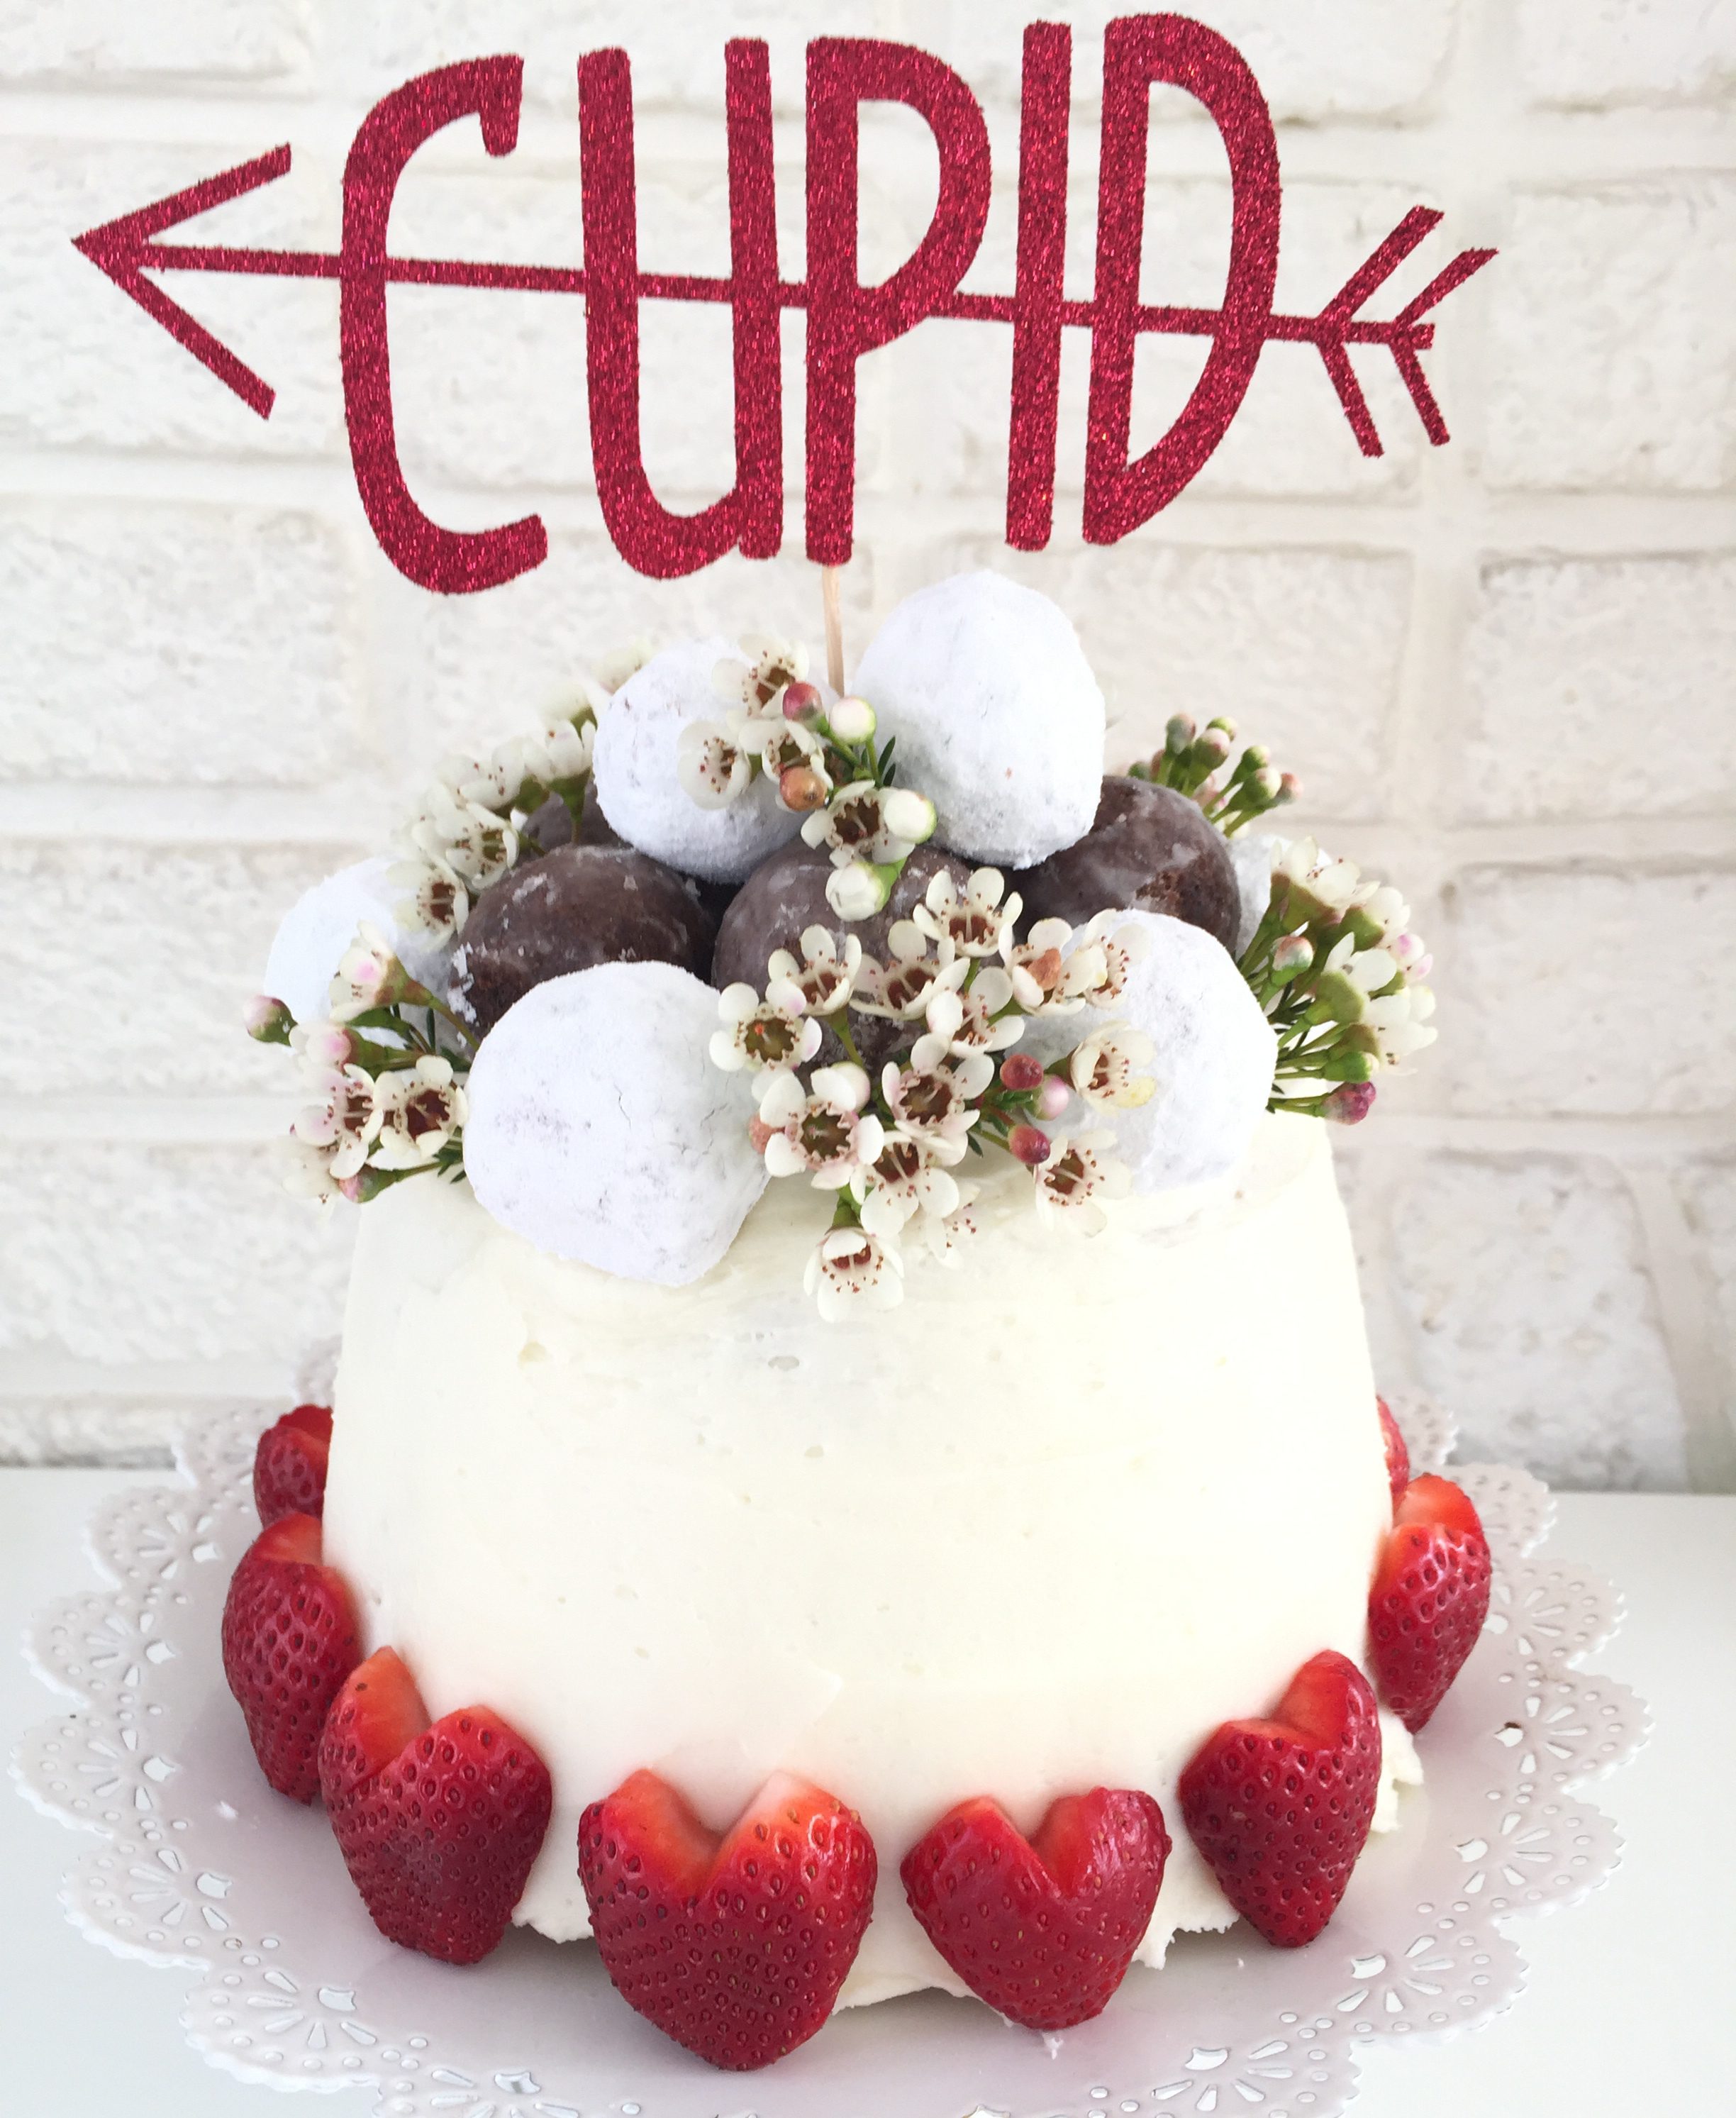
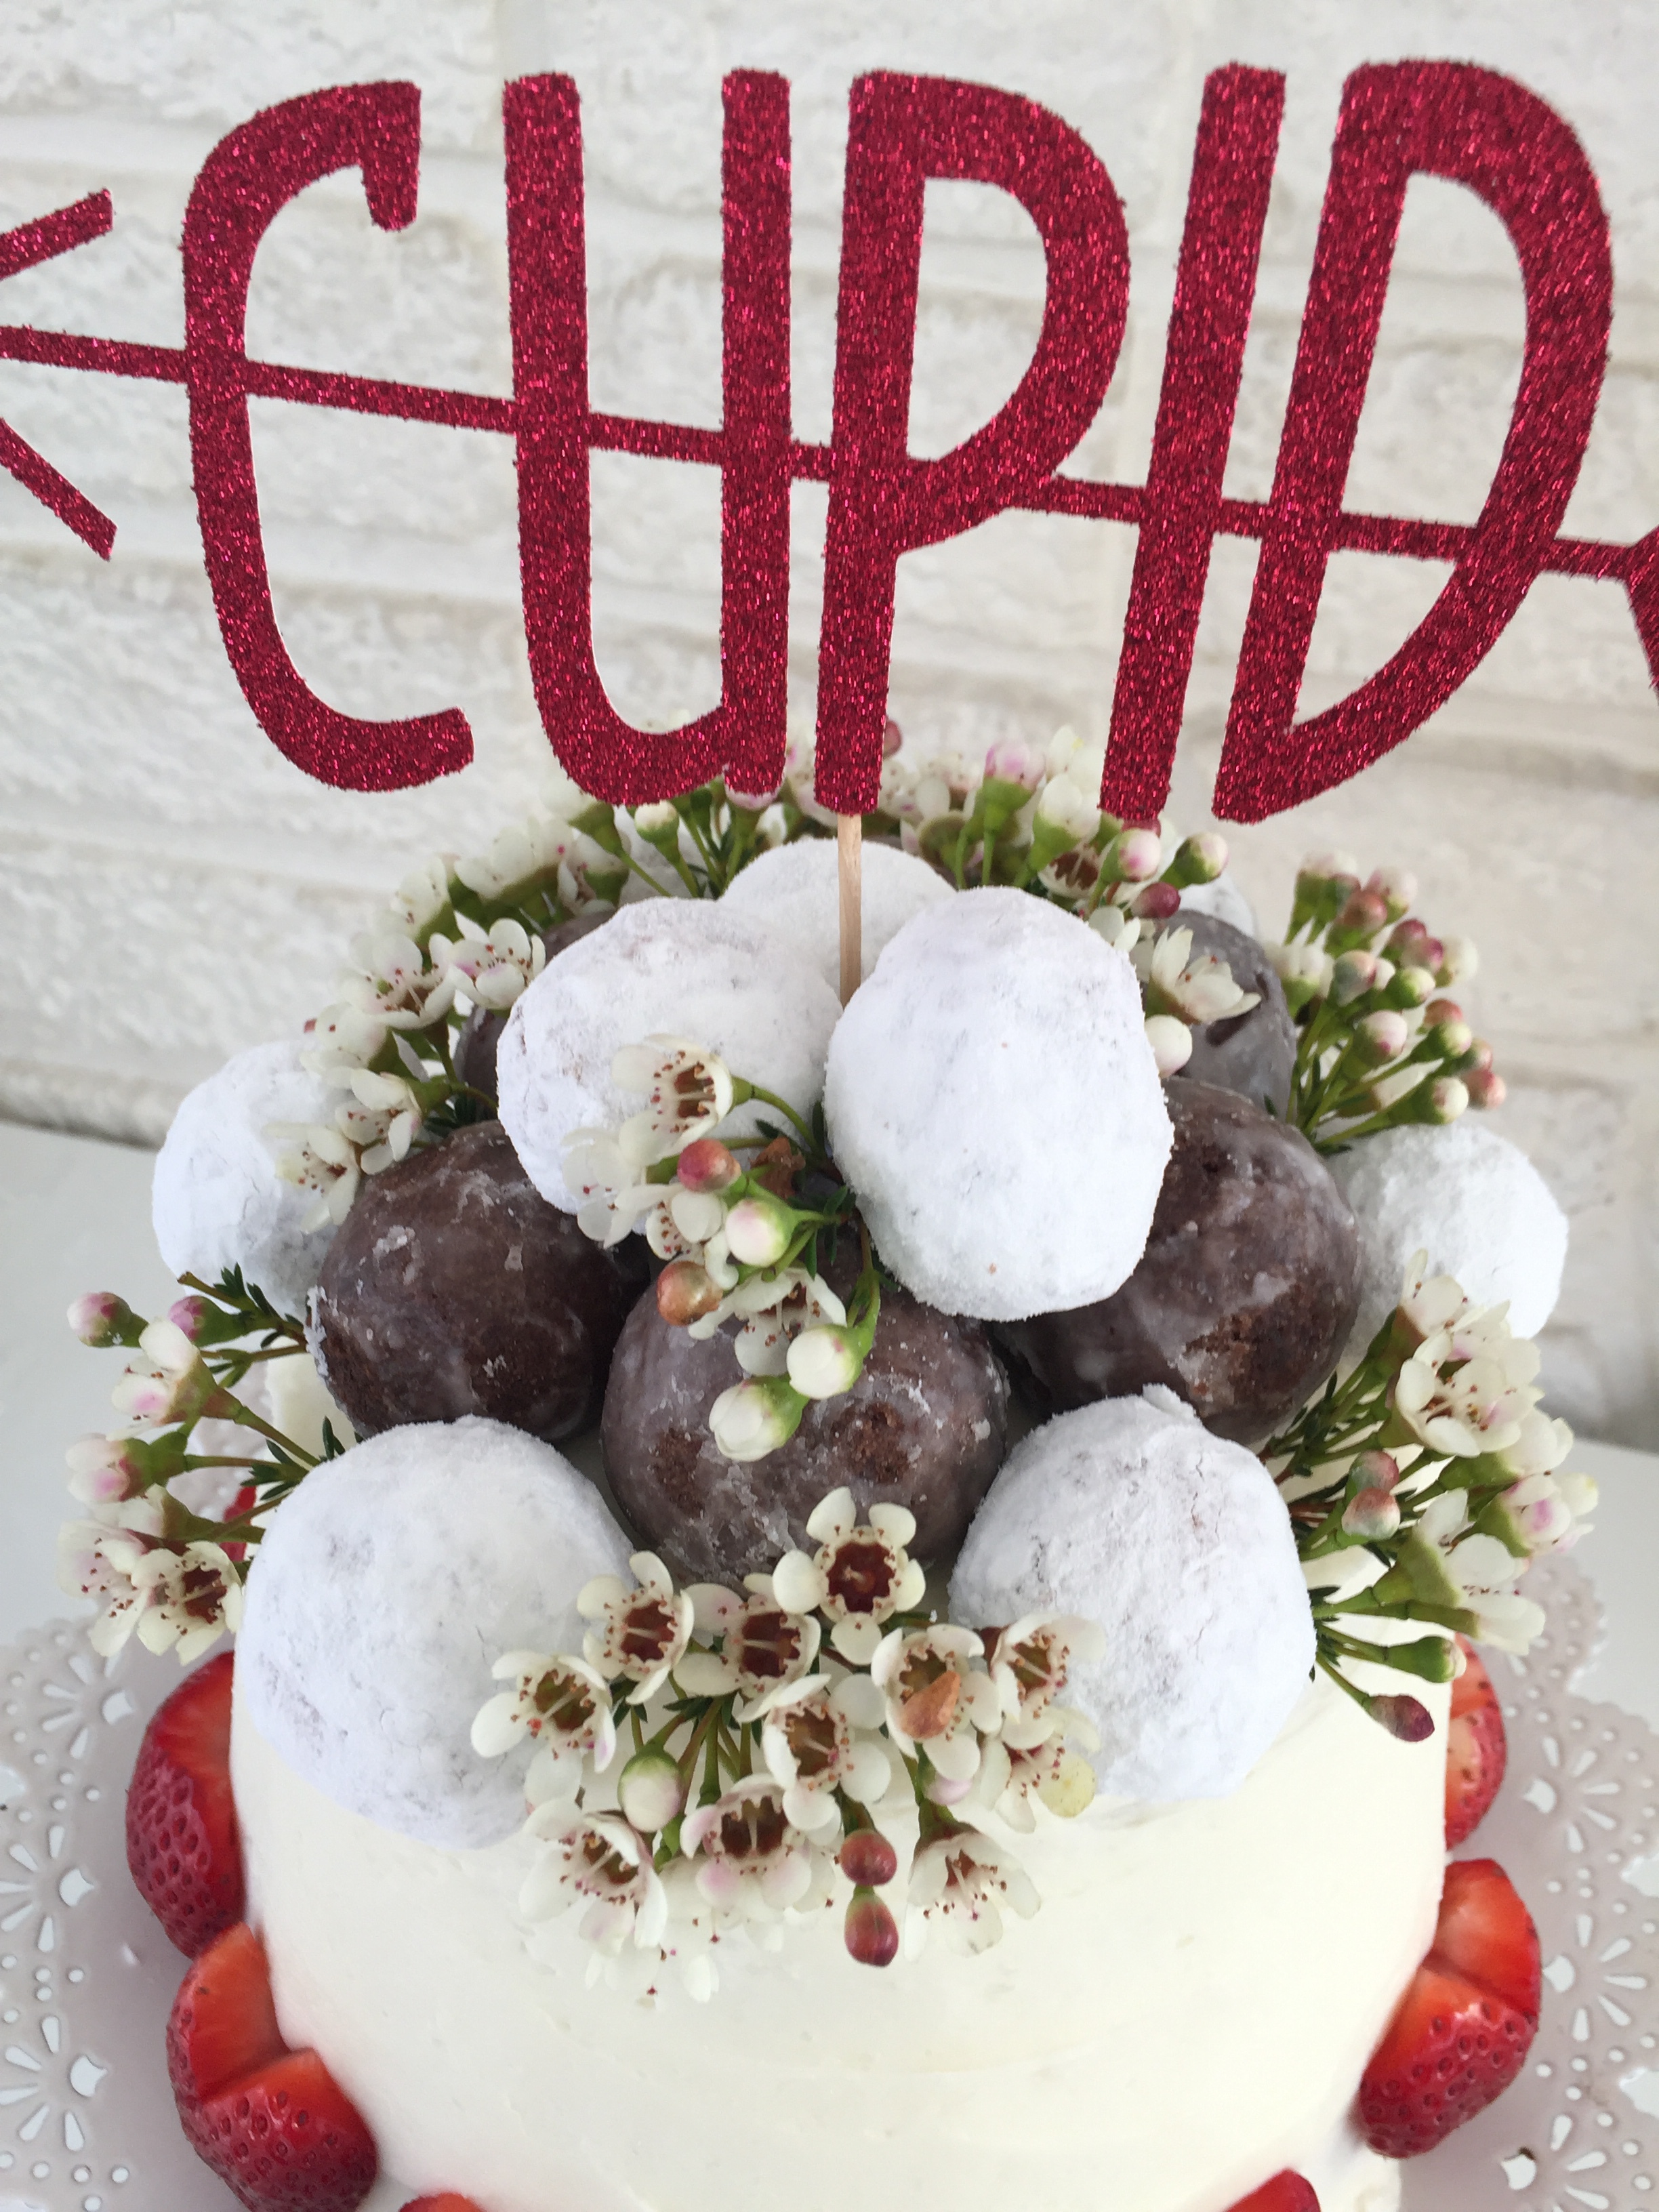
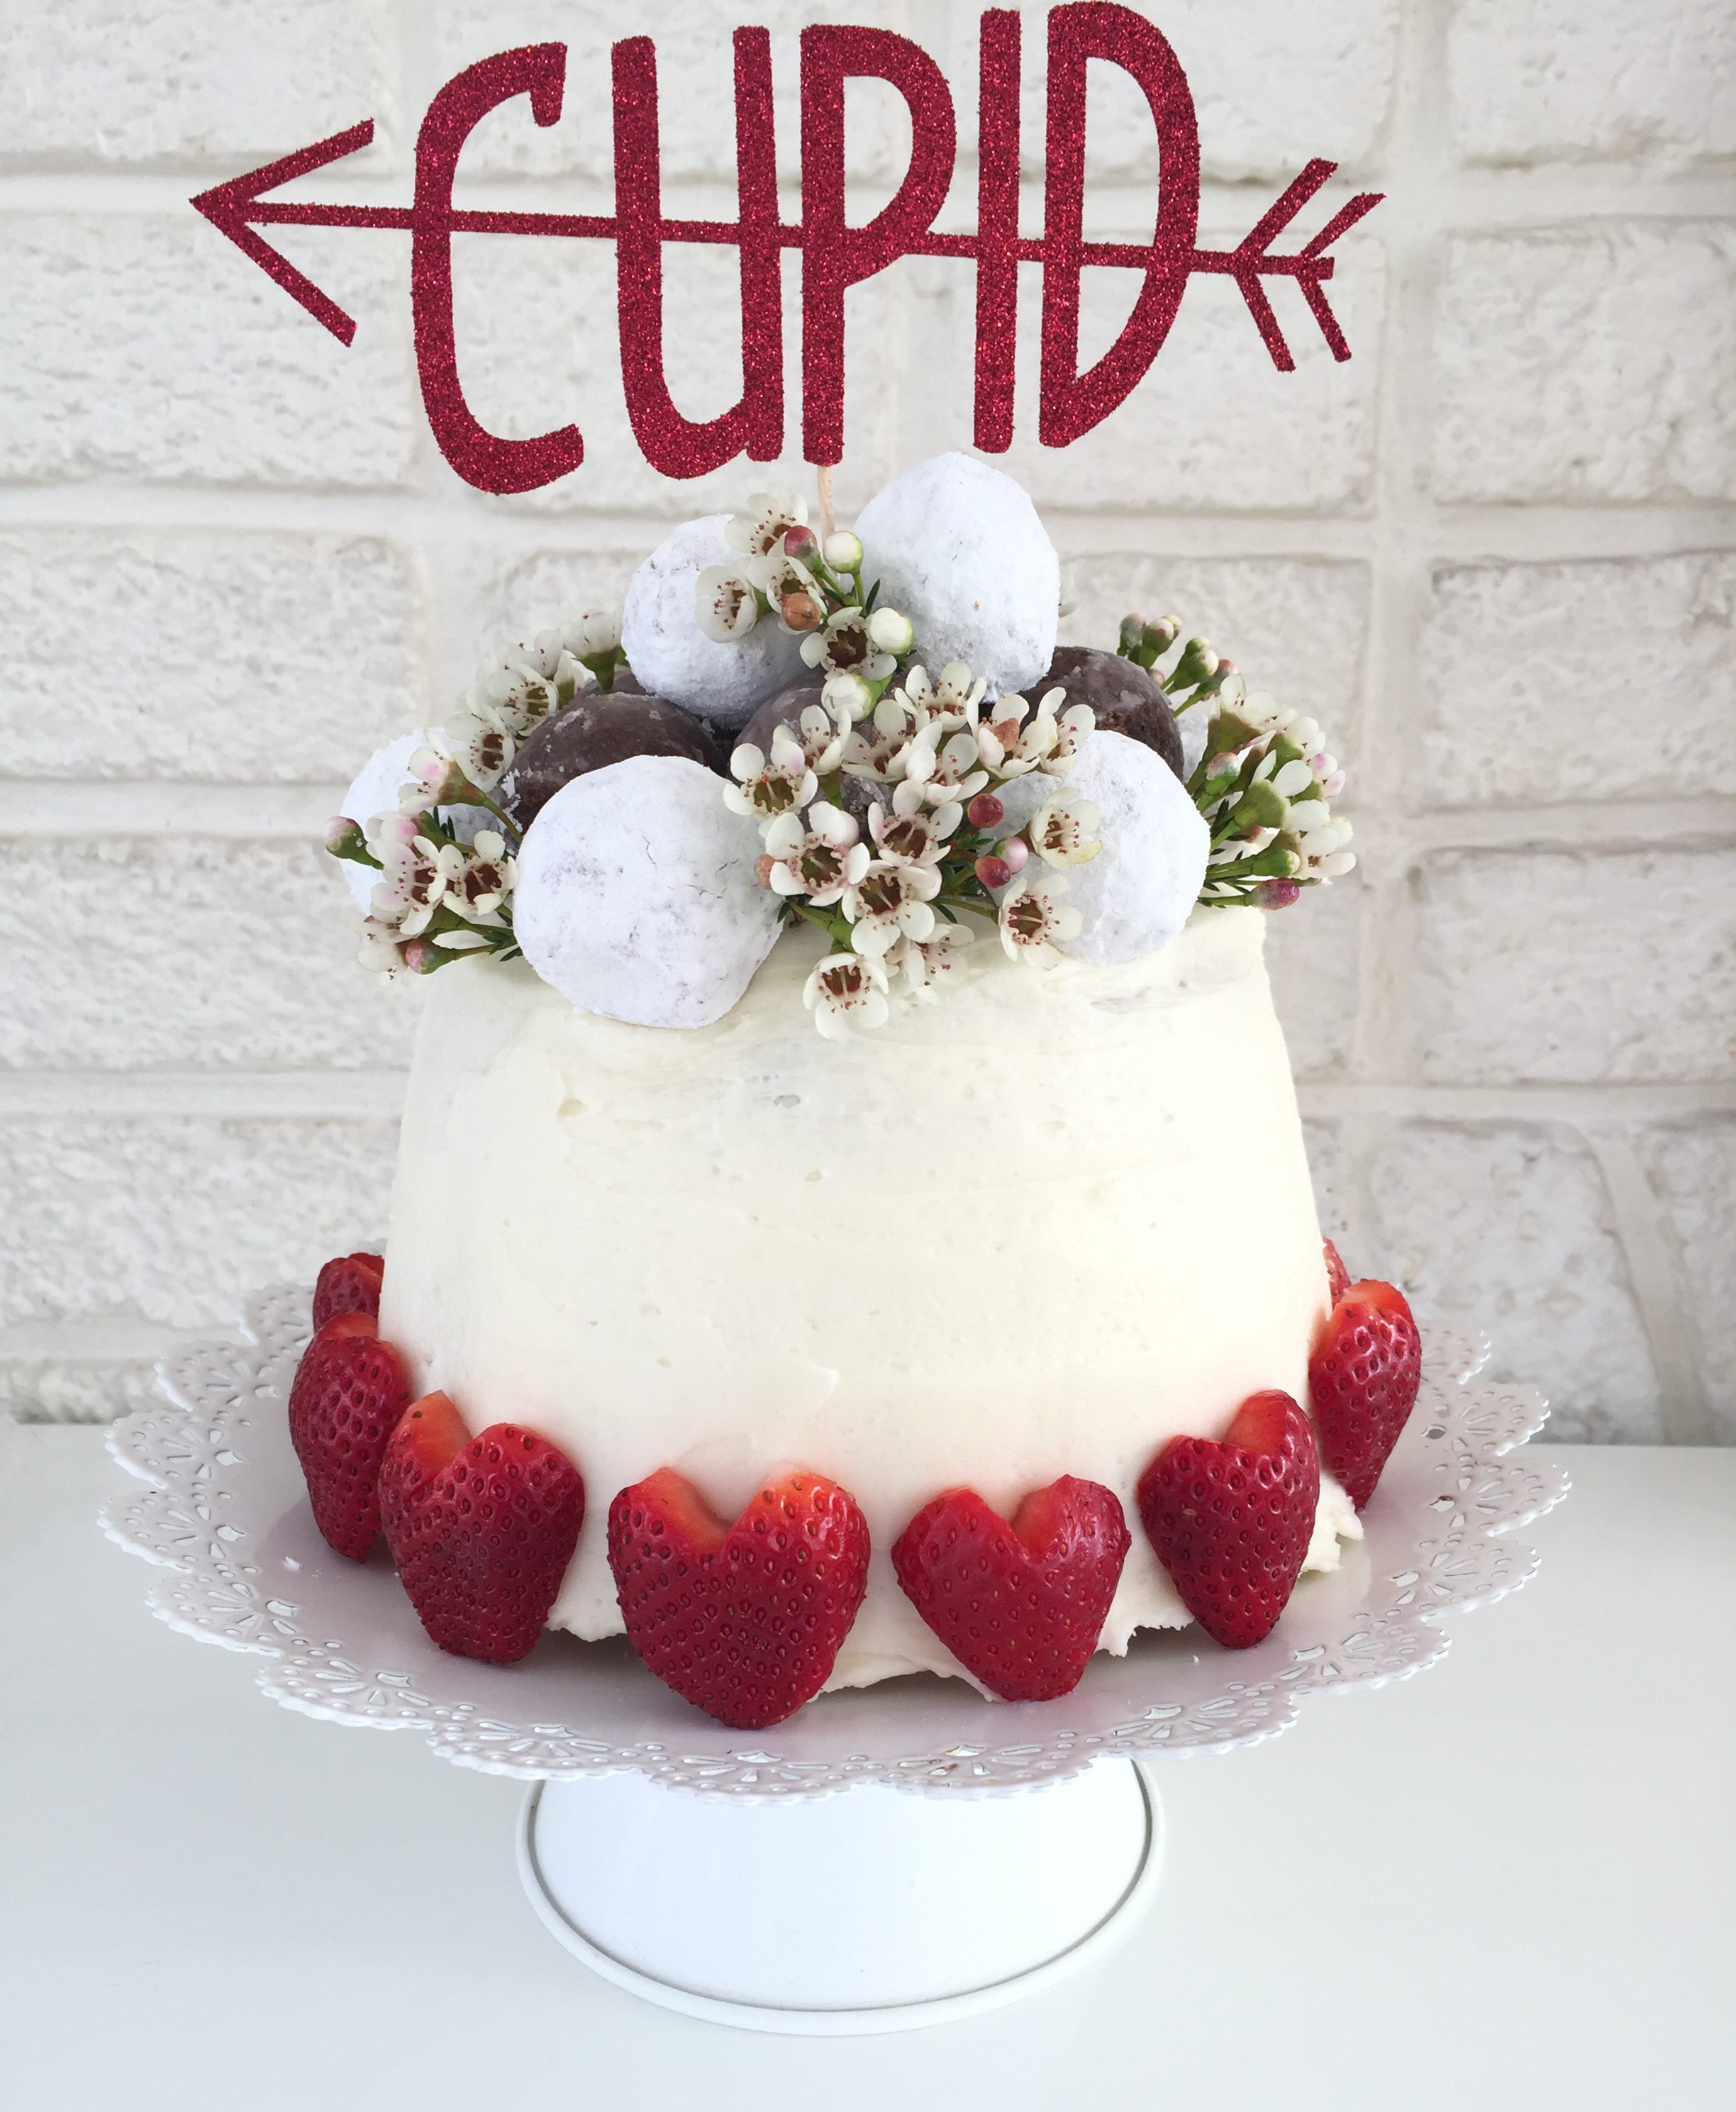
i use an almond buttercream icing on this cake, but you can frost it with your favorite or just sprinkle it with powdered sugar! this year i decided to use several tasty elements…
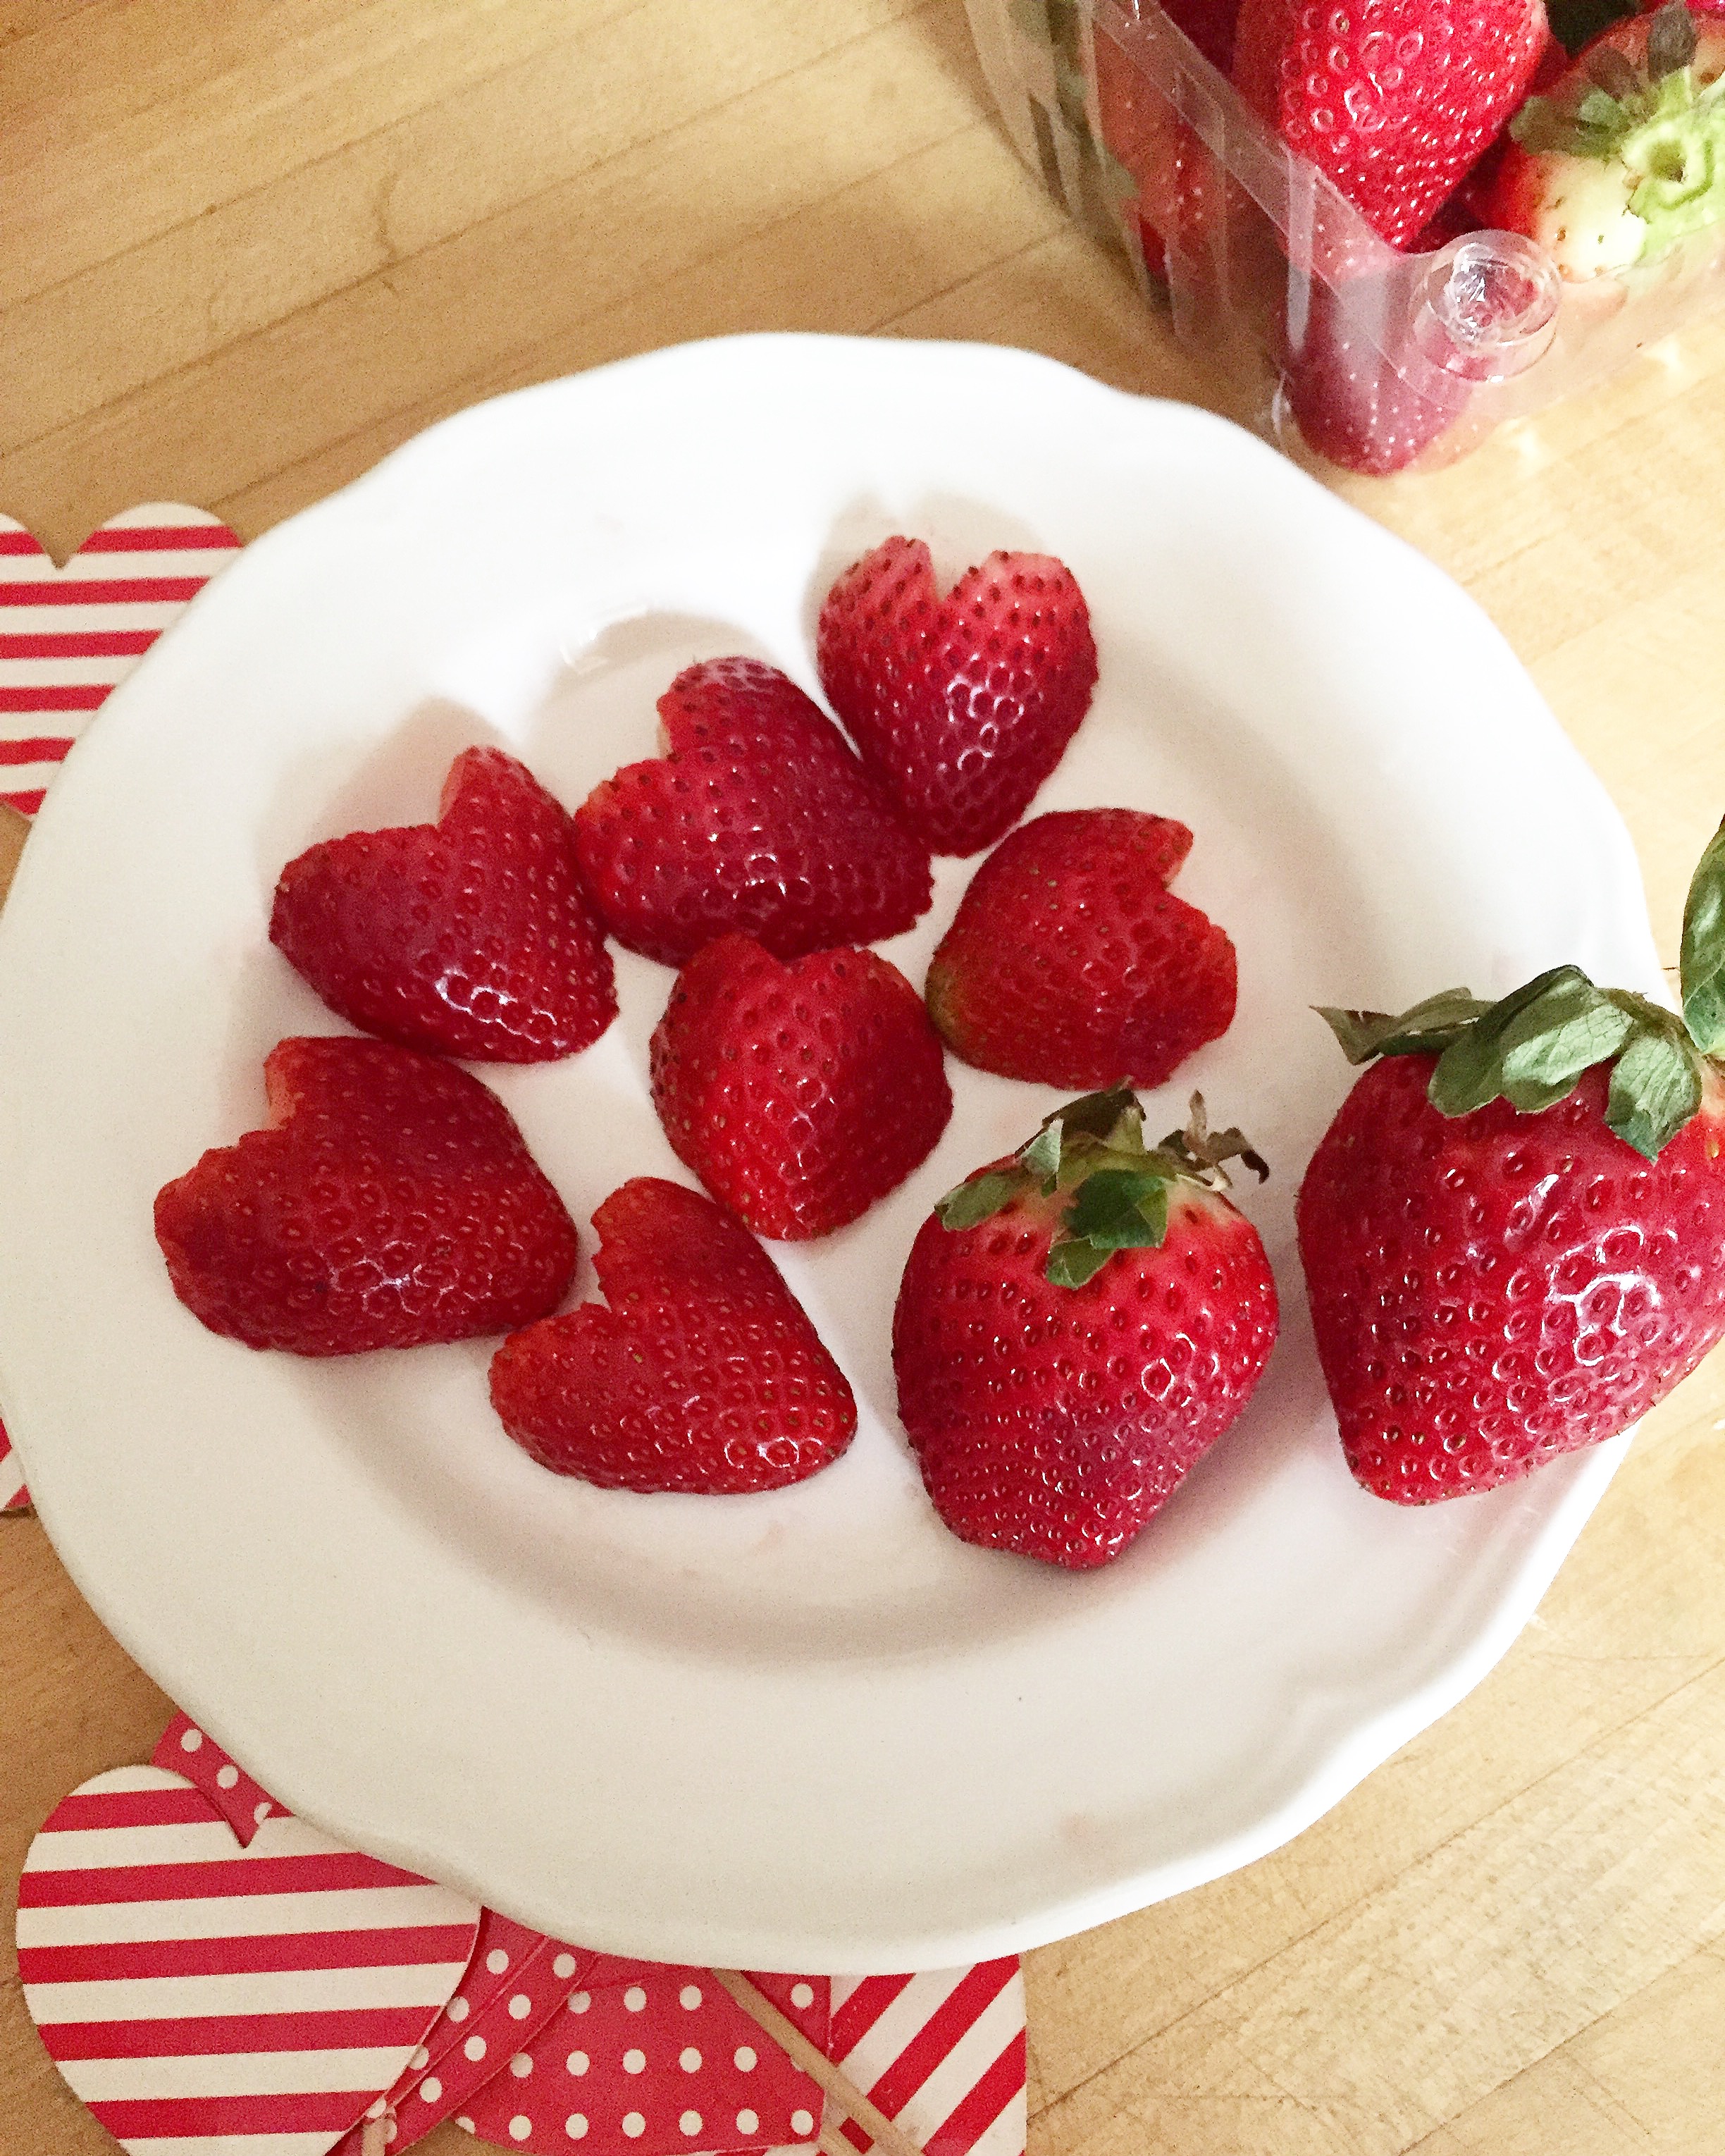
some sweet berry hearts…
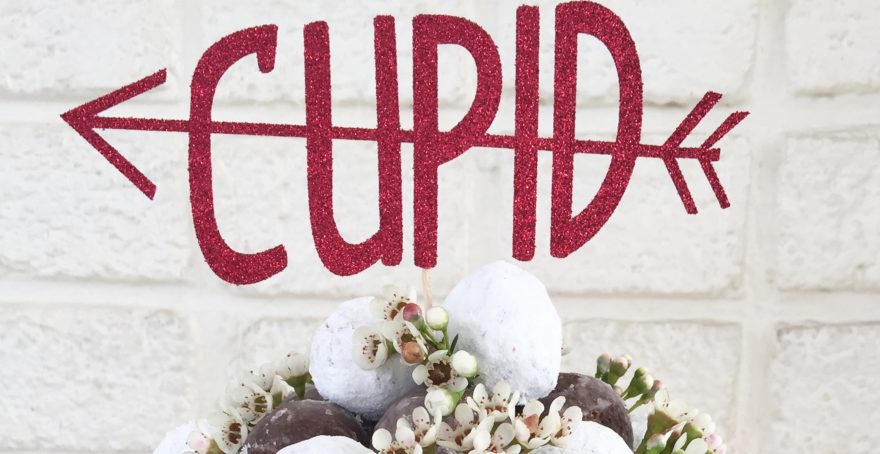
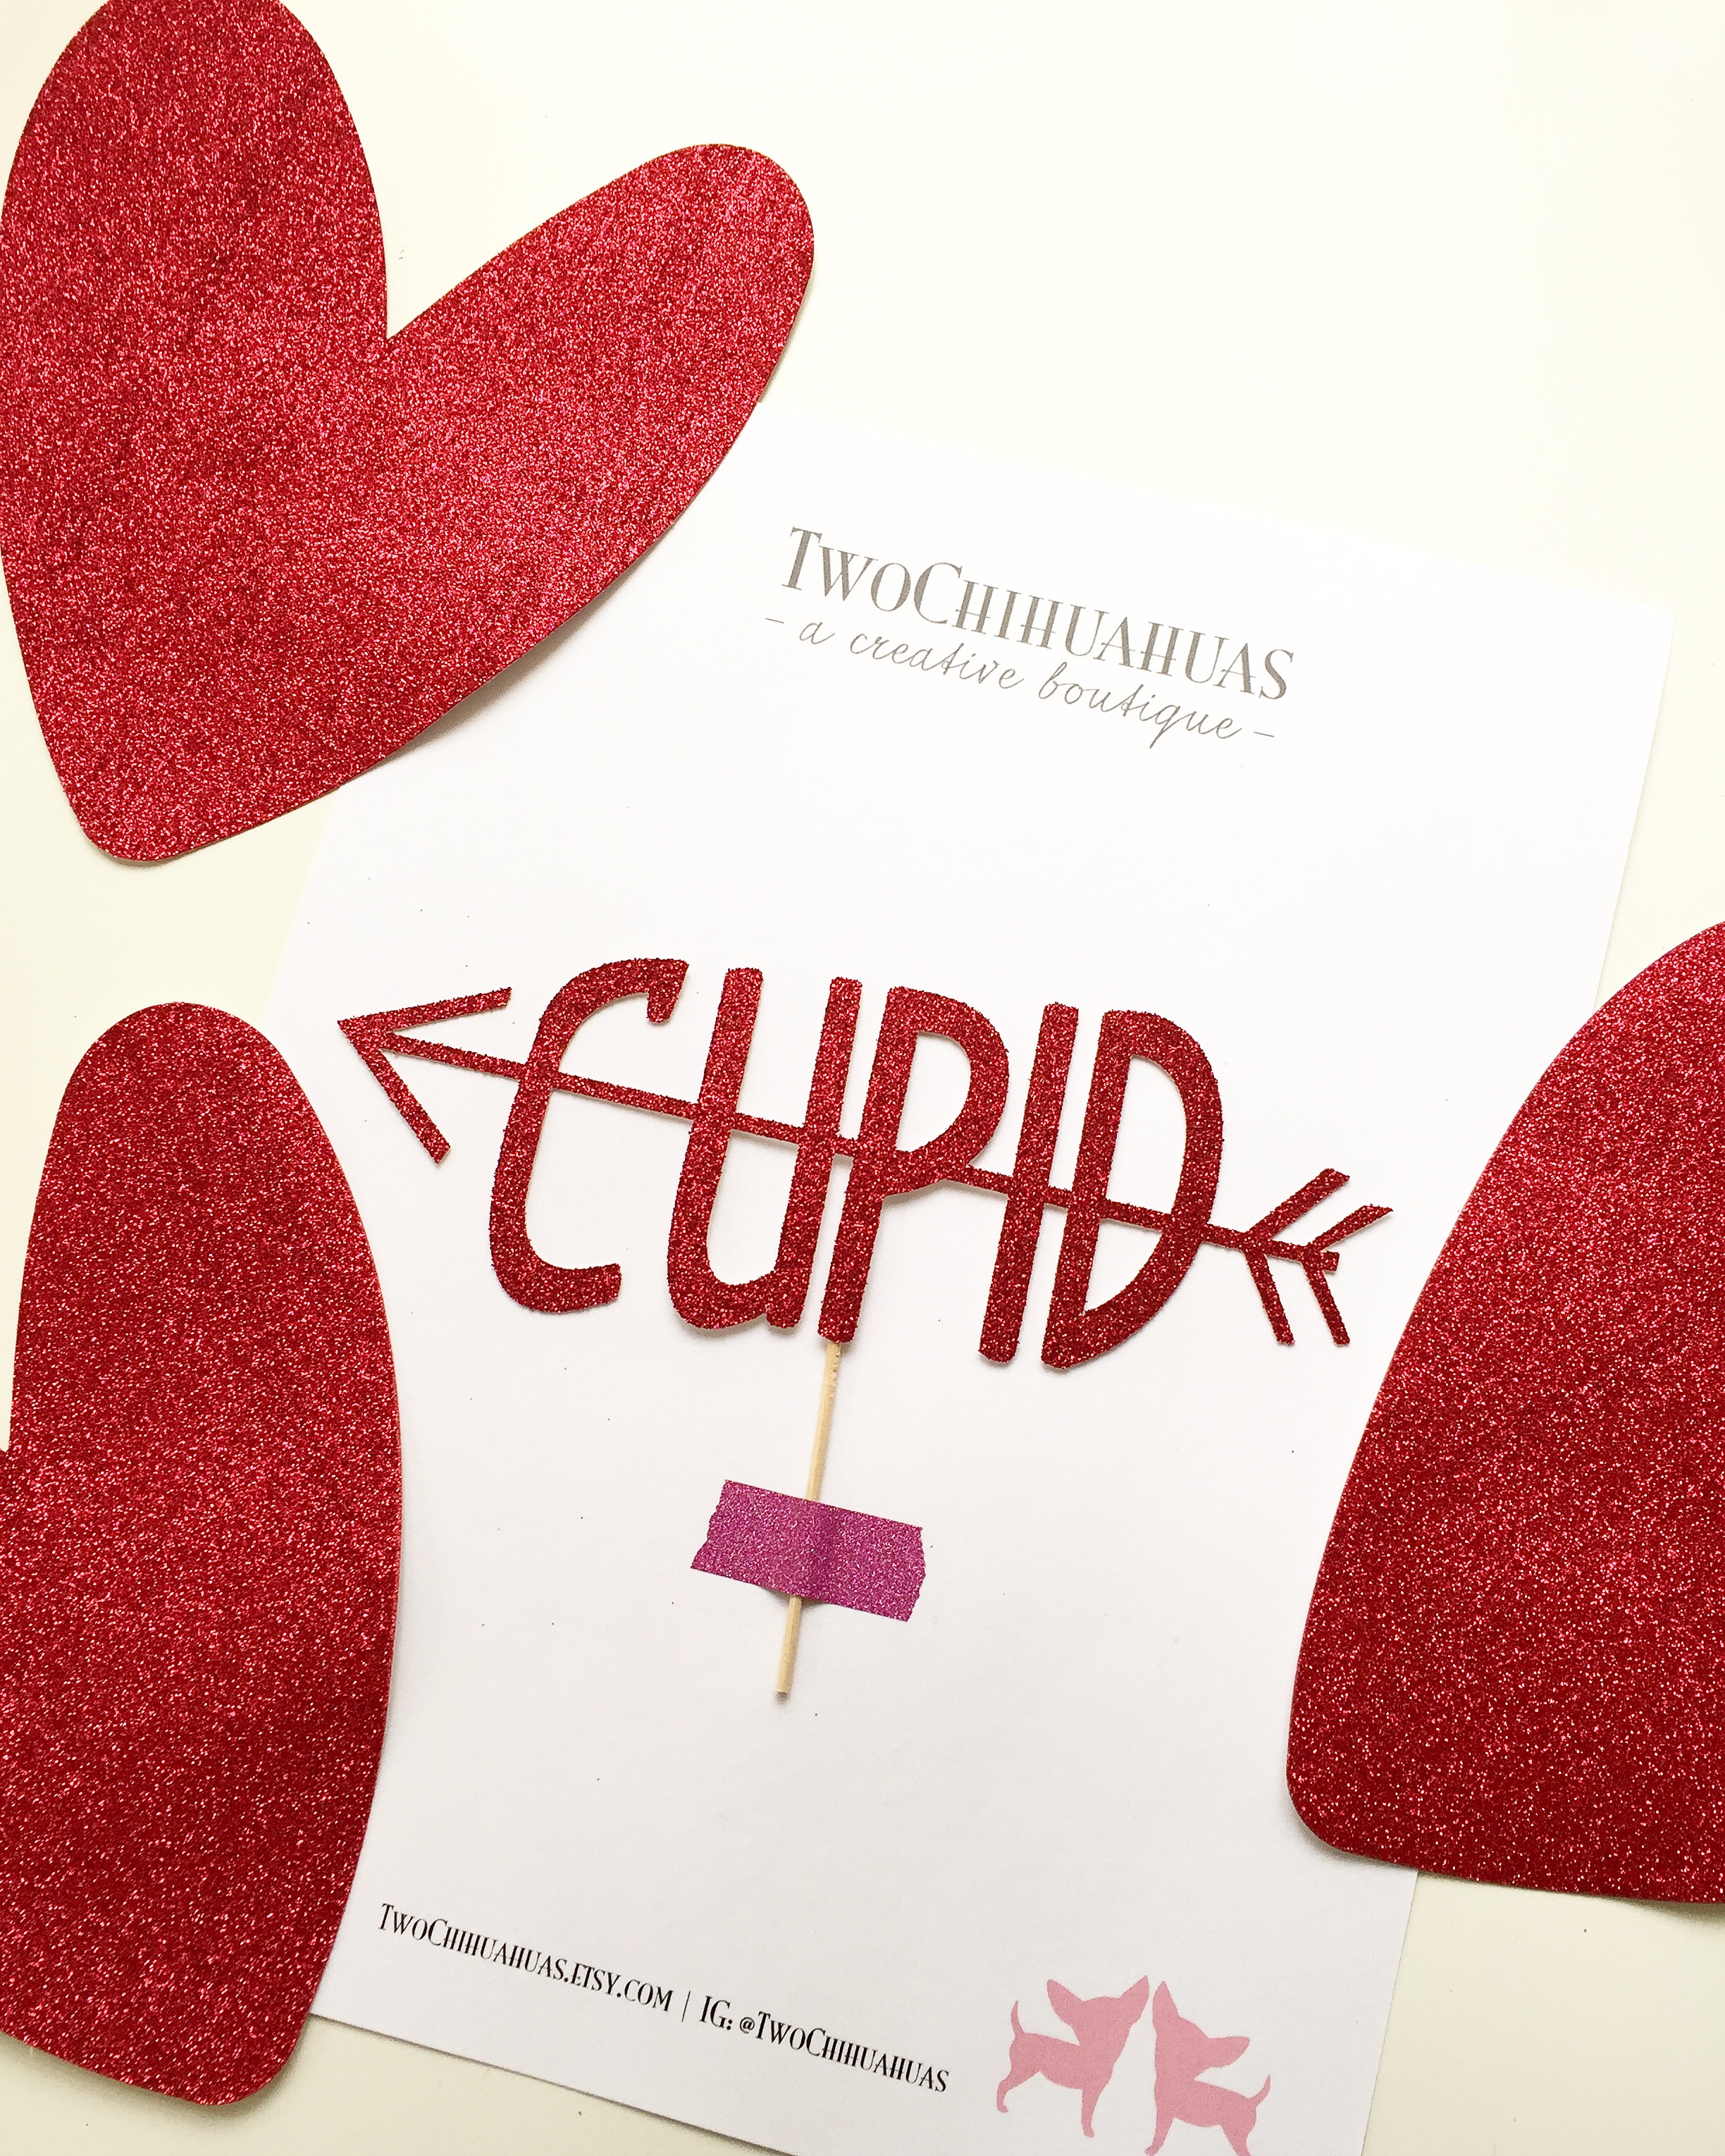
and an adorable cake topper by one of my friends who creates the most adorable things. check out Two Chihuahuas for plenty of partytime fun!
i thought some doughnut holes would be a fun to pile on top…why not, right? once i got them pressed into the icing, i used some flowers to tuck in the gaps. if you’re not using edible flowers just make sure to clean the stems from any foliage before tucking them in. then just remove them when you slice her up! almost done…

now for the ring of sweet berries around the bottom!
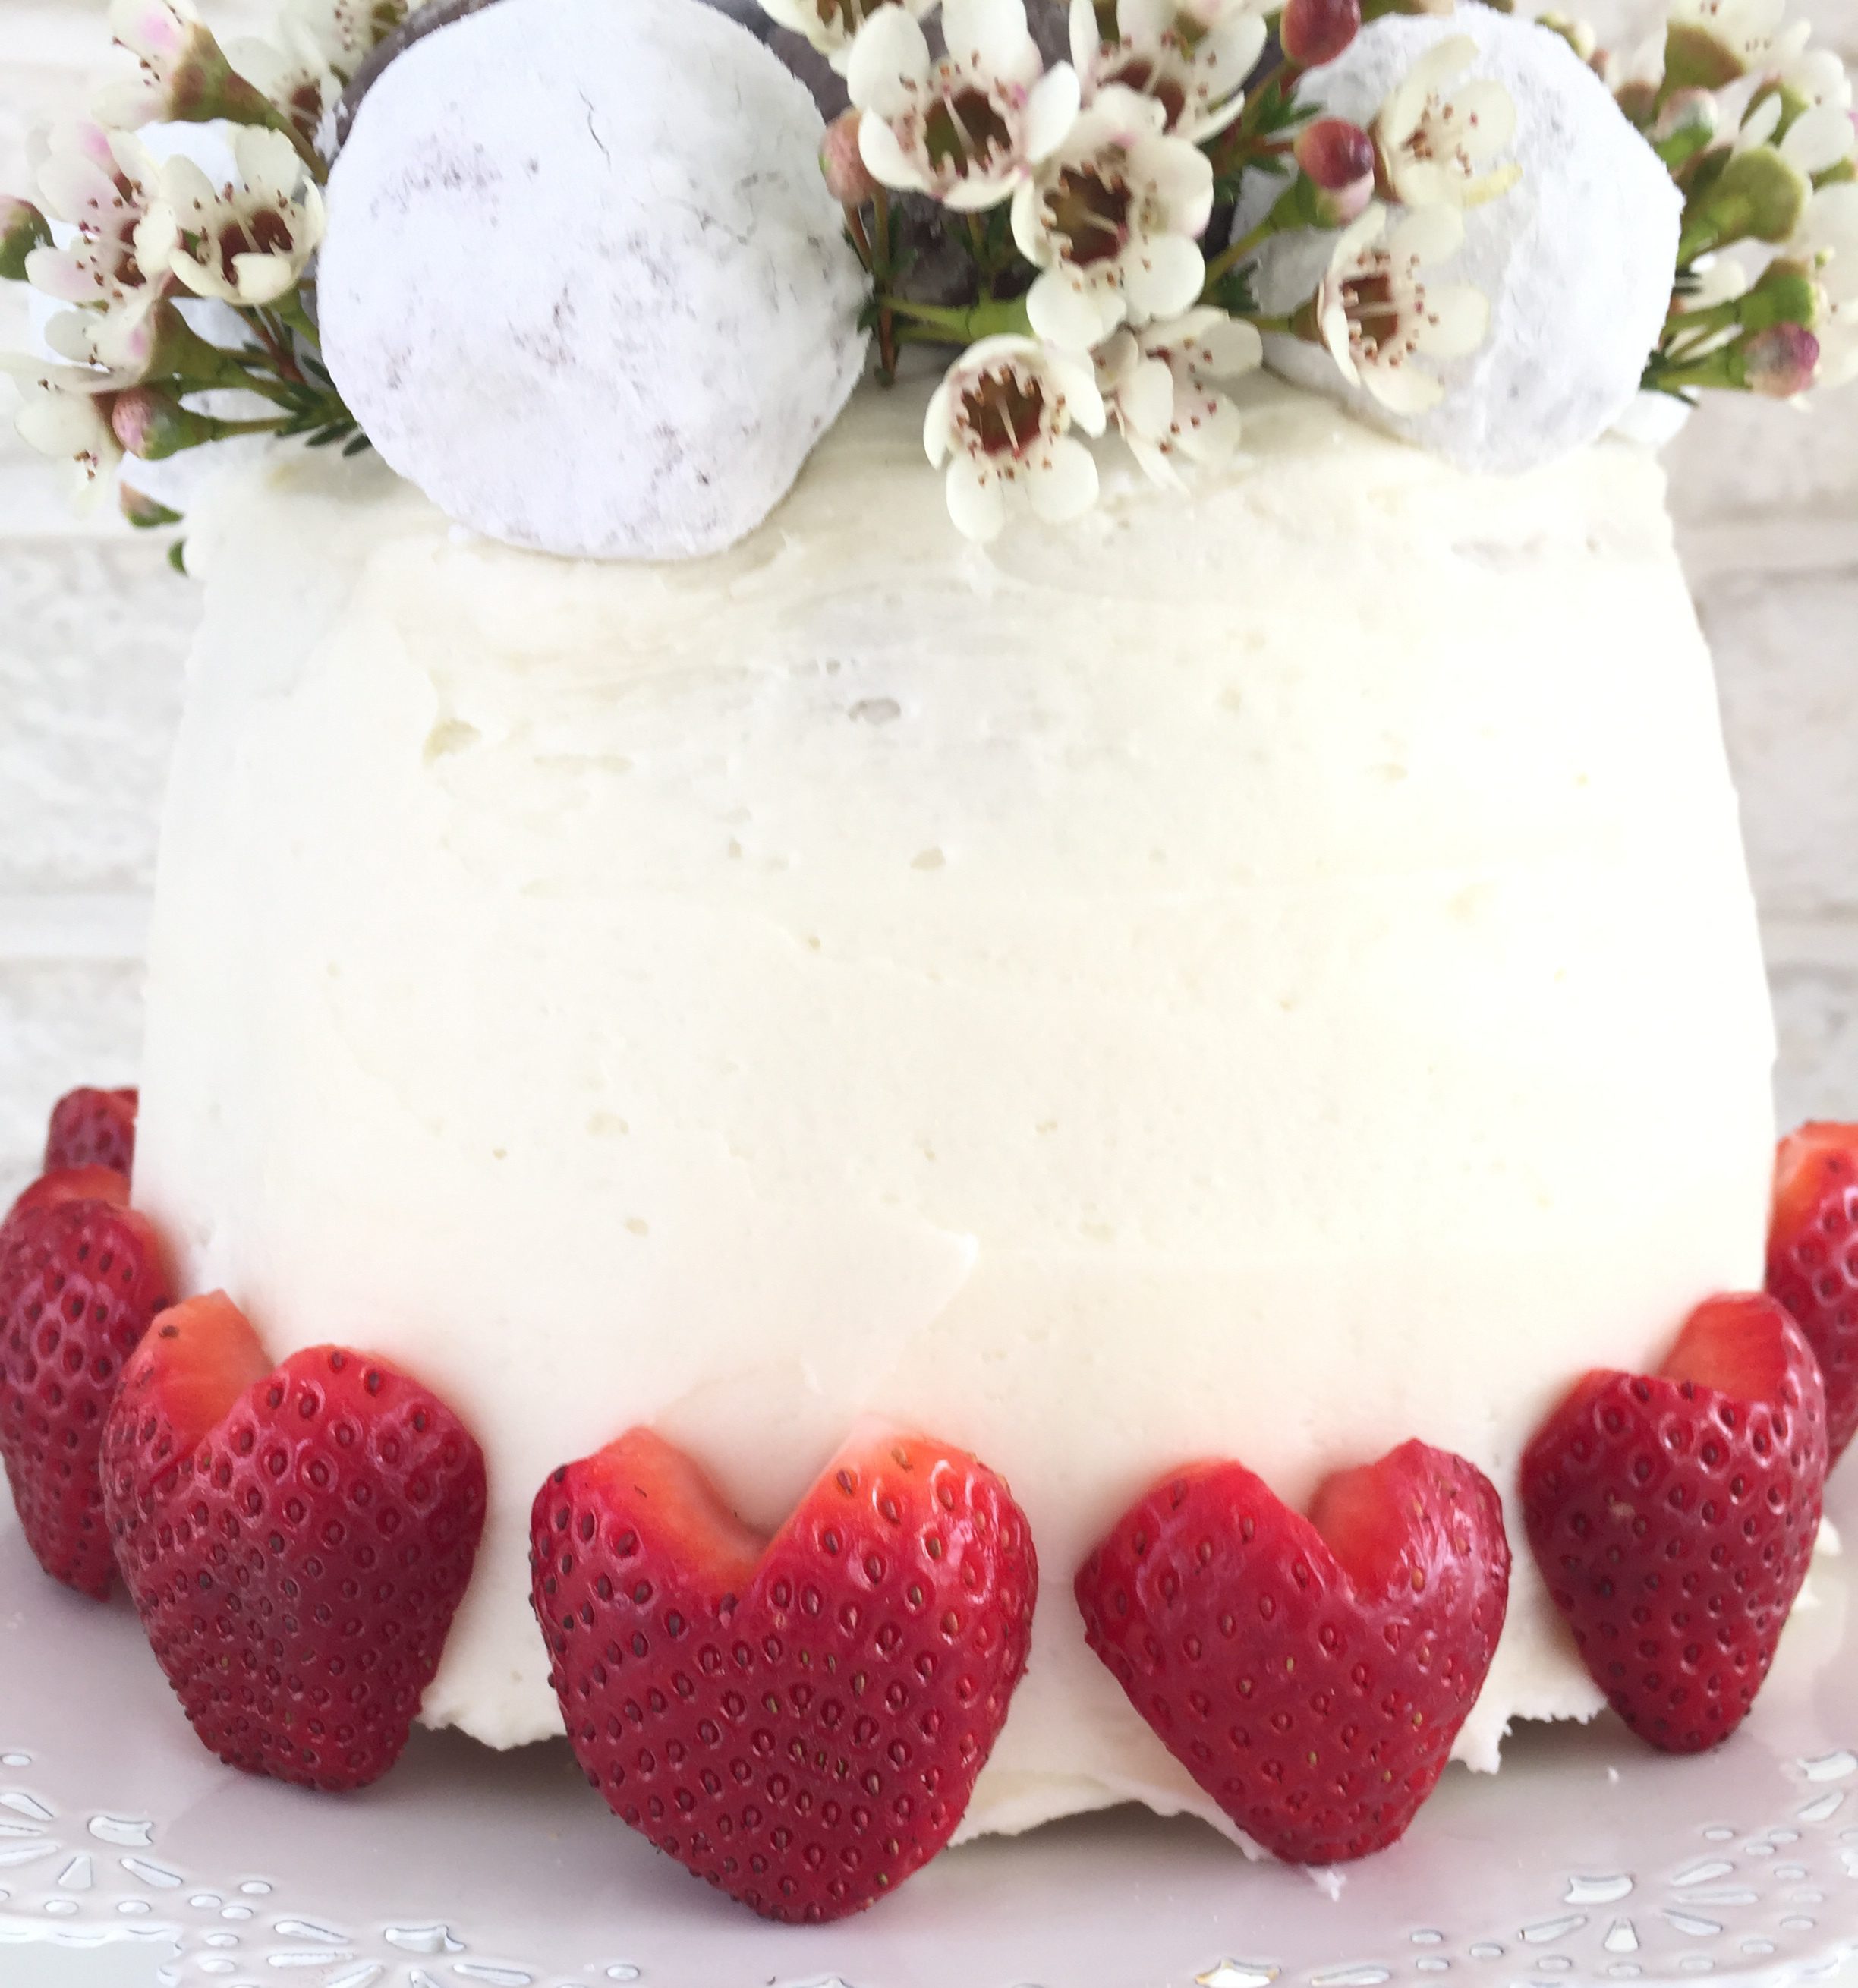
and the crowning touch…the adorable topper!
a fun, festive, and extra sweet way to serve it up…this year we included some friends to get in on the sugary fun! you might think it’s not big enough to serve a crowd, but this baby weighs a ton…a little goes a looong way!
this little cake freezes like a dream too so you can bake up a couple and before frosting, pop one in the freezer for later!
- 1 8 ounce block cream cheese at room temperature
- 3 sticks butter at room temperature
- 3 cups sugar
- 3 cups flour
- 1 teaspoon salt
- 6 eggs at room temperature
- 1 teaspoon lemon extract
- 1 teaspoon vanilla
- 1 teaspoon almond extract
- 1/4 cup apricot nectar at room temperature
- 1 1/2-2 tablespoons lavender flowers
- Beat the cream cheese and butter until creamy. Add the sugar and mix until light and fluffy.
- In a separate bowl add the flour and salt and set aside
- Add the eggs one at a time, alternating with the flour/salt mixture. mix well with each addition ending with flour. Then add the lemon, vanilla, almond extracts and the apricot nectar-mixing until blended. Fold in the lavender flowers by hand.
- Pour batter into two well greased, small pudding molds (similar to a small bundt or angel food pan) or you can use an alternate container such as a ovenproof bowl or clean, new, flour pot. you may need to adjust the bake time if using a container without a hollow center like the molds)
- Bake in a pre-heated oven set at 315 degrees for 1 hour and 20-30 minutes or until pick comes out clean.
- Cool 15-20 minutes. Loosen edges of pan with a knife and turn out from pan and cool completely. This cake freezes wonderfully. You can ice it and serve immediately or wrap well and freeze for up to 6 months.
Chocolate Cherry Cake…
this next recipe is more on the side of “semi-homemade” but no less festive OR tasty! my mom made this recipe for my dad’s birthday on Super Bowl Sunday and it was a hit with all the guests! the great thing about this pretty cake is you can whip up your favorite white cake recipe or use a box mix! topped with dollops of whipping cream and chocolate dipped cherries, this cake is so perfect for Valentine’s Day! i only have one photo that my mom shared of this festive dessert…she gets all the credit for this gorgeous girl!
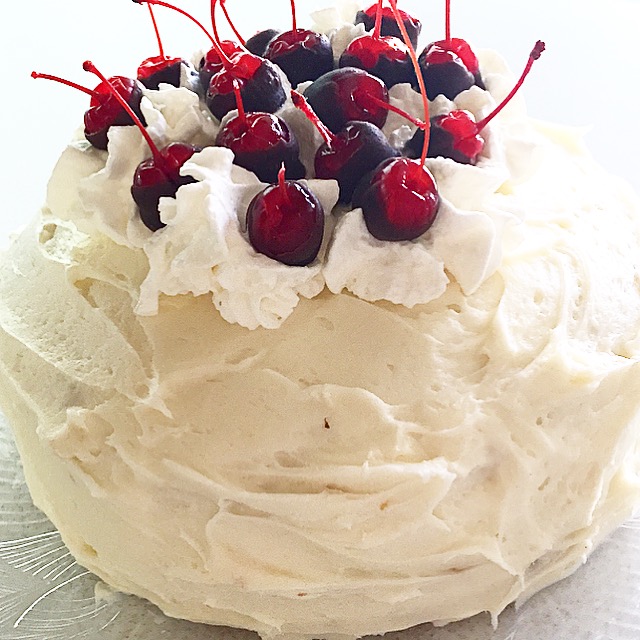
i’m just thrilled she shared the recipe with me…and now i’ll share it with you!
- 1 21 ounce can cherry pie filling
- 2 cups mini chocolate chips
- 1/2 tablespoon butter
- 1 10 ounce jar maraschino cherries with stems drained and patted dry
- red food color
- 4 cups prepared or homemade butter cream icing
- 1/2 cup heavy cream whipped
- 1 recipe white cake batter can use a box mix or favorite recipe
- For the Cake: Drain and rinse the cherry pie filling. Press the cherries between several layers of paper towels until very dry. Chop the cherries fine and measure out 1/2 cup. (can discard remaining pie filling cherries)
- Gently fold the 1/2 cup chopped cherries and 1/2 cup of the chocolate chips into your prepared white cake batter.
- Grease and flour 2-3 8 inch cake pans depending on how many layers you like. Divide batter among the pans. Bake on the middle rack of a pre-heated 350 degree oven for 20-25 minutes or until a pick comes out clean. Cool in pans 10 minutes, then turn out onto rack to cool completely.
- For the Cherries: Melt remaining 1 1/2 cups mini chocolate chips and butter in a bowl. Holding the stems of the maraschino cherries, partially dip them into the chocolate and place them on parchment lined plate. Refrigerate until hardened, at least 10 minutes.
- For the Frosting: Beat 5 drops (or more) red food coloring into your prepared frosting and blend until you have the desired color. Adding color can be optional.
- To assemble: Spread 3/4 cup icing on bottom layer. Repeat with the second layer. Top with final cake layer and frost top and sides with remaining buttercream. Decorate the top with the whipped cream and chocolate dipped cherries.
however you choose to celebrate or what ever goodies you indulge on…
Cassie
February 13
They are both such beautiful cakes!! And delicious, I am sure. 😋
Anonymous
February 13
Dear Lori, I definetely will make your mom’s cherry cake!
Xoxo
Lori
February 13
Thanks Cassie! Happy Valentine’s Day!
Lori
February 13
I hope you love it! Happy Valentine’s Day! XOXO